Incoming payments
An incoming payment records money received from a partner (for example, a customer) to a company bank account or cash register.
Incoming payments are typically used to:
- register the fact of money receipt;
- match payment with documents (close debt by invoices);
- see which documents are fully/partially paid and what debt remains.
Where to find it
Open: “Invoicing” → “Operations” → “Incoming payments”.
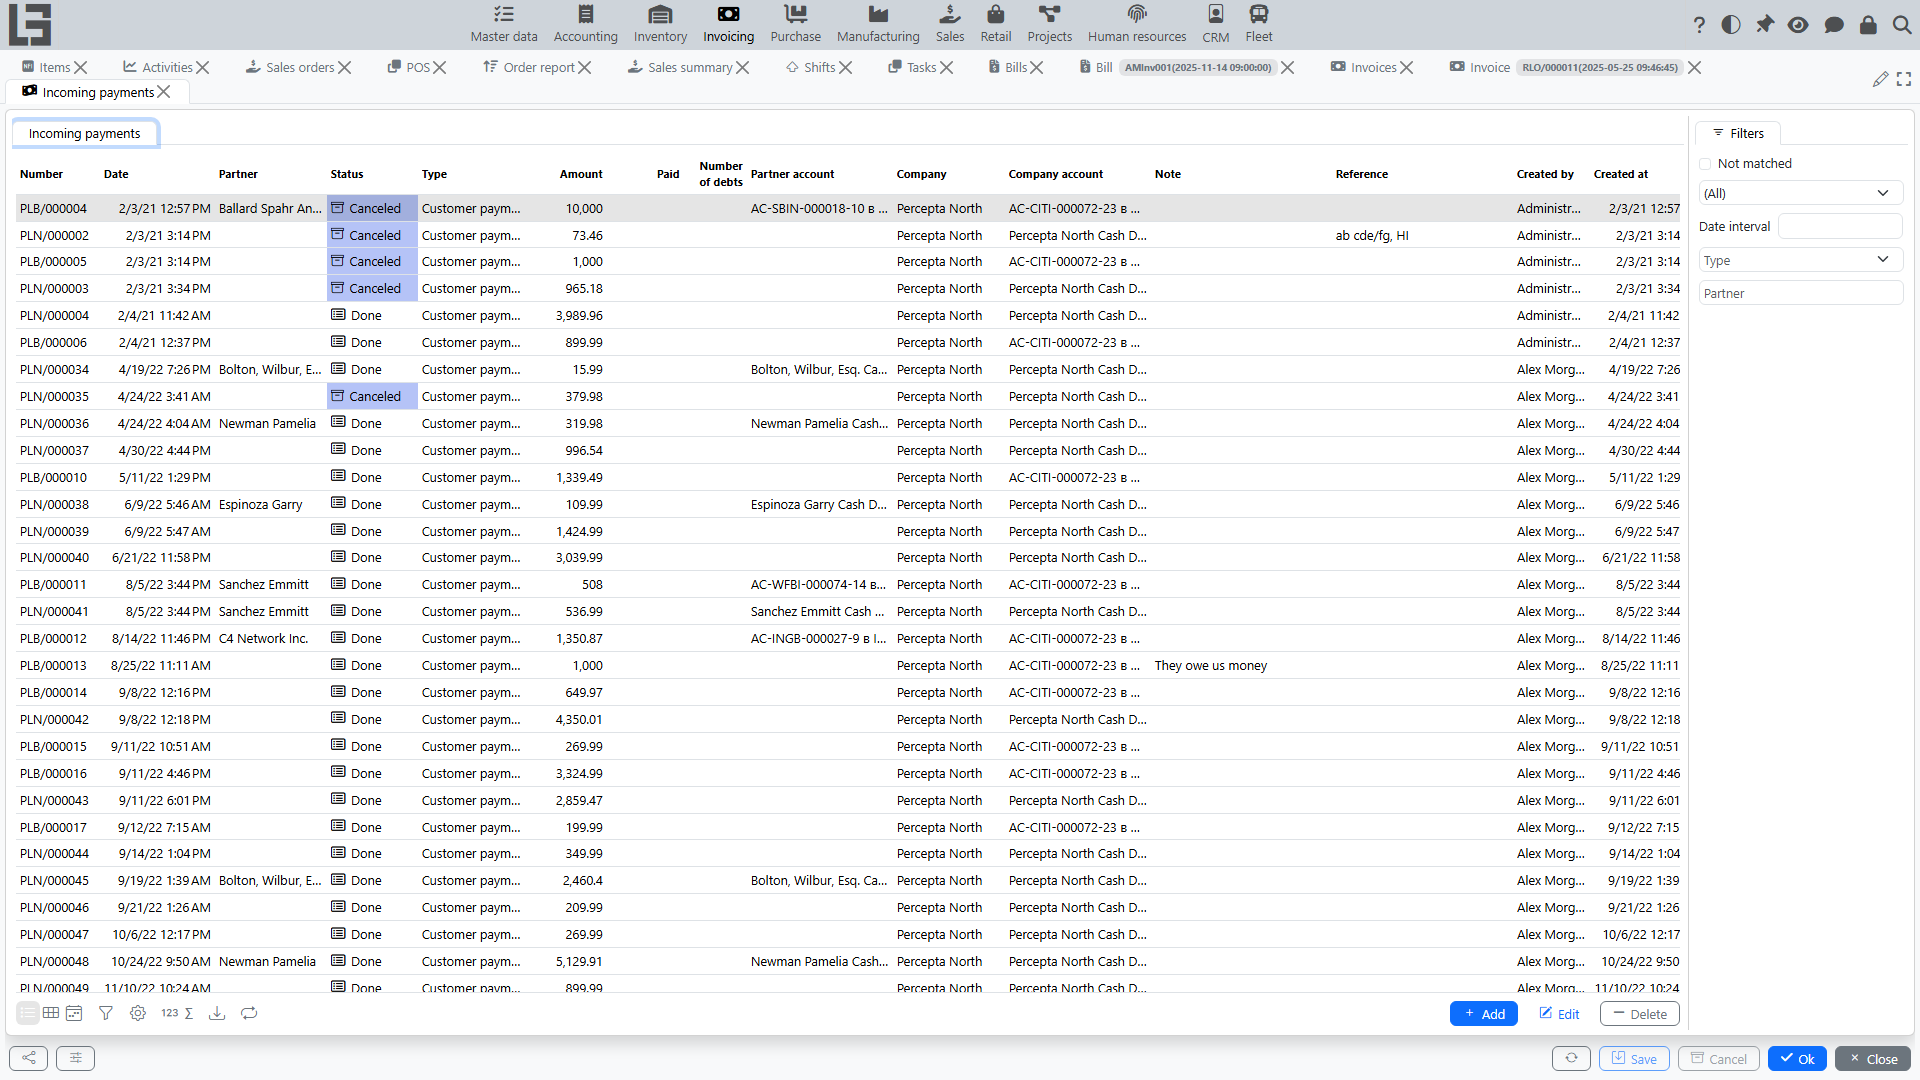
Creating an incoming payment
- Open the “Incoming payments” list.
- Click “Create”.
- Fill in the required fields (see below).
- If needed, perform payments matching with documents.
- Save the document.
Creating an incoming payment from an invoice
If you register payments by invoices, an incoming payment can be created directly from the invoice.
Typical flow:
- Open the required invoice.
- Move the document to status “To pay” (if it is still Draft).
- Click “Register Payment”.
- The created incoming payment card opens — verify the fields and save.
What is typically filled automatically:
- partner and its account/cash register;
- company and its account/cash register;
- payment type (depending on invoice type and settings);
- currency (if used);
- amount — usually equal to the current remaining amount due for the invoice.
What happens with matching:
- the system immediately performs payments matching with this invoice so that debt decreases;
- if you change the payment amount or you need a different matching, adjust it in “Payments matching”.
Important about statuses:
- the “Register Payment” action is available only when the invoice is in status “To pay”;
- the created incoming payment is created in status “Done” (i.e., it records the fact of money receipt).
An incoming payment created manually starts in Draft; use "Mark as Done" to post it. Incoming payments have no separate "To pay" stage — the flow is Draft → Done → Canceled.
Main fields
The exact set of fields depends on configuration, but a typical incoming payment contains:
- Type — determines where the money came from (bank/cash) and which accounts can be selected.
- Date and time — when the receipt was recorded.
- Number — internal document number.
- Amount — receipt amount.
- Partner — who the money came from.
- Partner account/cash register (if used) — partner details.
- Company — the organization receiving the money.
- Company account/cash register — where the money was received (bank account or cash register).
- Currency — derived from the company account/type.
- Analytic account (cash-flow item) — the analytic account allowed for the chosen payment type.
- Note — free text comment.
- Reference — a short reference string (for example, the payer's document number). If it contains a document number, the system auto-matches the payment against that debt (see below).
The built-in payment types cover the common cases — customer payment (bank/cash), supplier refund (bank/cash), internal transfer, and opening balance. A type flagged as Internal payment requires the partner to be one of your own companies.
Accounts/cash registers selection notes
The payment type can restrict options:
- for some types only bank accounts are available;
- for others only cash is available.
If you select an account/cash register that does not match the payment type, the system may not allow saving the document.
Payments matching and debt closure
To make an incoming payment decrease debt for specific documents, you need to match it with these documents.
In the payment card there is a “Payments matching” section with:
- Matched — amounts already linked to documents;
- Available — documents that can be paid by this payment (for an incoming payment these are customer invoices);
- Match action — link an amount to the selected document.
Matching is only allowed between documents of the same partner and company.
How to match a payment
- Open the incoming payment.
- Go to “Payments matching”.
- In the “Available” list select the document you want to pay.
- Click “Match” (or simply double-click the row).
- Verify that a line appears in “Matched” with the matched amount.
Tip: if you fill the Reference field with the invoice number, the payment matches that invoice automatically — no manual step needed.
Partial payment
If the payment amount is less than the document amount:
- the document is paid partially;
- the remaining amount stays as debt;
- you can close it with the next payments.
One payment for multiple documents
If a partner paid several documents at once, match the payment to several lines — one per document.
Overpayment
If the payment amount is greater than the matched amount, the remainder stays not matched and can be applied to later documents from the same partner. (Prepayments that must be offset against a specific future sale are handled by advance invoices rather than by the payment itself — see Invoices.)
Linking to an outgoing payment
If the payment type has a linked outgoing type, a posted incoming payment shows a "Create outgoing payment" action (or creates one automatically when the type has Automatically create outgoing payment set). This drives internal transfers between your own accounts — an incoming "transfer in" paired with an outgoing "transfer out".
Finding “not matched” payments
The incoming payments list has a “Not matched” filter — it helps quickly find payments that are not linked to documents yet and therefore do not close any specific document's remaining amount. (Such a payment still affects the partner's overall balance.)
Printing
The predefined print form is titled "Incoming payment"; printing uses the Incoming payment templates configured for the payment type.
See: Reports and printing.
Typical situations and solutions
The payment is entered, but debt did not decrease
Check:
- Whether payments matching with documents was performed.
- Whether the correct partner and company are selected.
- Whether the document is Canceled (if cancellation is used in your configuration).
Cannot select an account/cash register
The usual reason is a mismatch between the payment type and the account/cash register kind. Try:
- changing the payment type;
- selecting a different company account/cash register.
I don’t see the “Register Payment” button in an invoice
This is usually caused by one of the following:
- the invoice is not moved to status “To pay”;
- a suitable incoming payment type is not configured for the invoice type;
- there is no remaining amount due for the invoice (already paid or amount due is zero).